


Perler Bead Flower
Make a Perler bead flower using our free, downloadable flower Perler bead patterns. These flowers, made from melty beads, are SO PRETTY and easy to make!
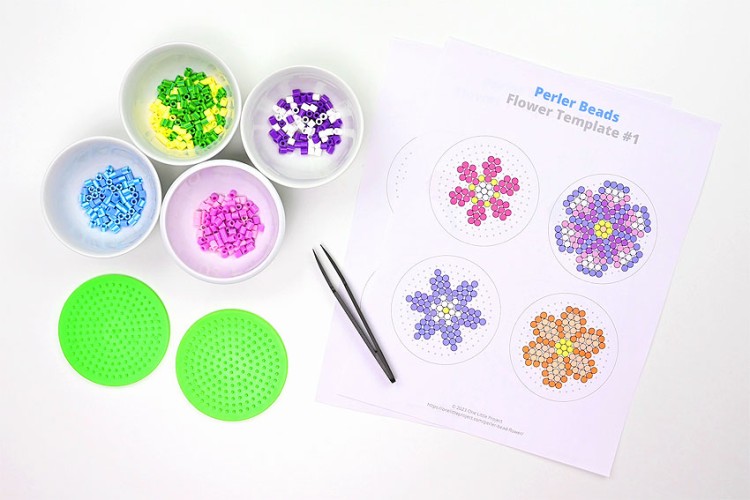
Choose from 6 different designs and make flowers with petals of all different sizes and shapes. Or create a 3D flower that stands up on its own! It’s such a fun and easy craft, perfect for celebrating the beauty of spring and summer flowers!

How to Make a Perler Bead Flower
Use our FREE patterns to make a Perler bead flower! Choose from 6 different designs and make flowers from melty beads. Such a fun kids craft!
AUTHOR: Debbie Chapman
Materials:
- Perler beads (MULTIPLE COLOURS)
- Perler beads pegboard (SMALL ROUND)
Equipment:
Check Out The Video Tutorial:
Looking for more Perler bead crafts? Here’s a few of our favourites:
Instructions:
Step 1: Find what you need
- Gather your supplies and materials.

- Step 2: Follow the template to make a flower
- To make a Perler bead flower you will use a round pegboard.We also found it helpful to separate and set out the colours of Perler beads we wanted to use.

- Optional: Use tweezers to add the Perler beads to the pegboard. Little fingers probably don’t need to do this, but it makes it a lot easier for adults!

- Start by adding a yellow bead to the center of the pegboard, and then form two circles of beads around it. We used two complimentary shades of blue Perler beads.Then follow the template to add a stem and a leaf, connected to the flower.

Step 3: Iron the flower
- Put the pegboard on an ironing board or a wood cutting board. Place a piece of parchment paper over top of the Perler bead design.Heat the iron to medium temperature, no steam. Place the iron on the parchment paper and move it around in circular motions for at least 15 – 20 seconds.

- Check the beads to see if they’re melted together. Continue to iron for another 10 – 20 seconds, if needed.The beads should be melted correctly when the parchment paper sticks to the beads and needs to be peeled away from them.

- Once the flower is cool enough to touch, remove it from the pegboard and flip it over.

- Iron the second side of the flower, making sure that it is melted, but not too melted – otherwise it won’t fit in the base.

- Step 4: Create and iron the flower’s base
- To create the flower’s base, make two circles around the center of the board with green Perler beads. Follow the template and be sure to leave the center peg empty

- Iron the base following the instructions above.

- Again, the beads will be melted correctly when the parchment paper sticks to the beads and needs to be peeled away from them.You only need to iron one side of the flower’s base, but you can do both sides if you’d like.

- Step 5: Put the flower together
- Once both parts of the flower are cooled, insert the stem of the flower into the center of the base.This can sometimes be tricky to do, but they will fit together once you find the right angle. If you still have issues with them staying together, use glue to attach them.

- Your Perler bead flower is complete!

- Helpful Tips:
- We find it easiest to start from the center of the template when making our Perler bead flowers.
- Ironing both sides of the 3D flower will help it stand up straight in its base!
- Leave the larger, flat Perler bead flowers on the pegboard until they’re cool to the touch.
- This will prevent the beads from melting together in the center.
