


Mushroom Artkal Beads
These mushroom Artkal beads designs are SO CUTE! Working with Artkal beads is such a fun activity. Both kids and adults will have a blast creating their own mushroom pixel art!
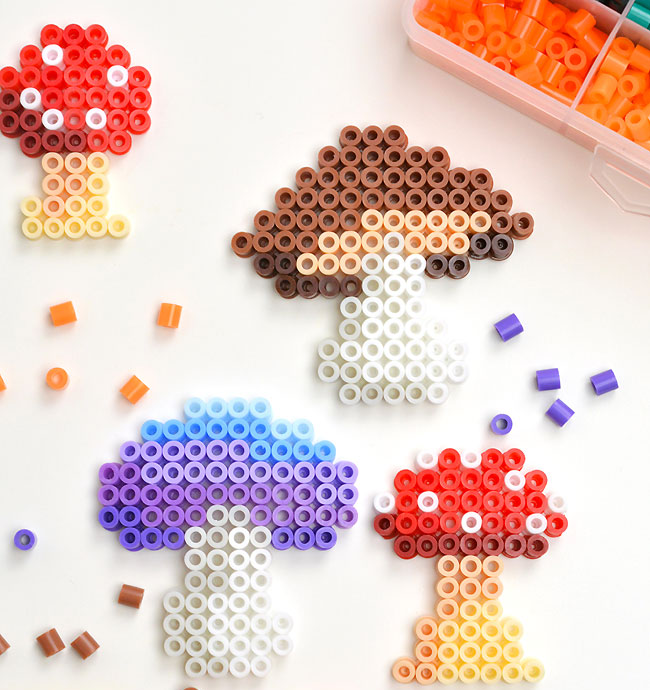
We used our clay mushrooms as inspiration when designing these mushroom Artkal bead patterns, and we love how they turned out! These colourful mushrooms are whimsical, magical, and super easy to make using our free printable templates!

This post contains affiliate links. If you use these links to buy something we may earn a small commission which helps us run this website.
How to Make a Artkal Bead Mushroom
These mushroom Artkal beads are so fun to make! Make a Artkal bead mushroom using our free, printable templates. It’s such a cool and easy kids craft!
AUTHOR: Debbie Chapman
Materials:
Equipment:
- Free Printable Mushroom Artkal beads template (get the 2nd template below)
- Tweezers
- Parchment paper
- Iron
Check Out The Video Tutorial:
Looking for more Artkal bead patterns? Here’s a few of our favourites:
Dinosaur Artkal Beads
Cat Artkal Beads
Instructions:
Step 1: Find what you need
- Gather your supplies and materials.

Step 2: Make your Perler bead mushroom on the pegboard
- To make a Perler bead mushroom you’ll need to use a small square pegboard.
- We also find it helpful to separate and set out the colours of Artkal beads we want to use.

- Optional: Use tweezers to add the Artkal beads to the pegboard. Kids may not need to do this, but it makes it a lot easier for adults
- Start adding Artkal beads to form the bottom of the mushroom stem.You can follow our template or design your own mushroom pattern.

- Continue working your way up the mushroom, adding the rest of the stem.
- Follow the template and continue adding Artkal beads until you’ve filled in the whole mushroom.

- Compare your mushroom to the template to make sure it’s exactly how you want it to look.

Step 3: Iron your mushroom
- Set the pegboard on an ironing board or a wooden cutting board. Place a piece of parchment paper over top of the Artkal bead mushroom.Heat your iron to medium temperature, no steam. Place the iron on the parchment paper and move it around in circular motions for at least 15 – 20 seconds.

- Check to see if the beads are melted together. Continue to iron for another 10 to 20 seconds, if necessary.
- The Artkal beads are melted correctly when the parchment paper sticks to the beads and needs to be peeled away from them.

- Leave your mushroom design on the pegboard until it’s cool to the touch.

- Your Artkal bead mushroom is complete!

Helpful Tips:
- We find it easiest to start from the bottom of the mushroom stem and work our way up, but you can add the beads in whatever order you’d like!
- Apply gentle pressure when ironing the Artkal beads to make sure that none of them get knocked over.
- If you have a clear pegboard you can slide the template underneath, making it even easier to make your mushroom Artkal beads creation!

Download our free mushroom Artkal beads templates:
Click on the links below to download our free, printable Artkal bead mushroom templates! The PDF files will open in a new window.
Then simply follow along with the pattern on your device’s screen, or print the templates in colour on 8.5 x 11 (letter size) printer paper.
