


Creating with Artkal: 40 crafts with beads to iron on
What are Artkal or Hama Beads?
Artkal and Hama Beads are both types of iron-on beads made of plastic material to be placed on a perforated base with small nails to create the desired design . Once the design is completed, the pearls will be ironed in order to definitively lock the position; in fact, the heat of the iron will partially melt the plastic and fuse one bead to another. The substantial and only difference betweenArtkal and Hama Beads is that Hama Beads are a little longer than the equivalent Ikea product.
Where to buy iron-on beads
The iron-on beads with their perforated base can be easily found at Ikea at a very affordable price. For those who don’t have the opportunity to go to Ikea, they can purchase them conveniently from Amazon, where they are available in different shades of colors and sizes. The bases, fundamental for creating a precise design, exist in different shapes and sizes, from the more classic square, or in the shape of a star, rhombus, heart and triangle depending on needs.
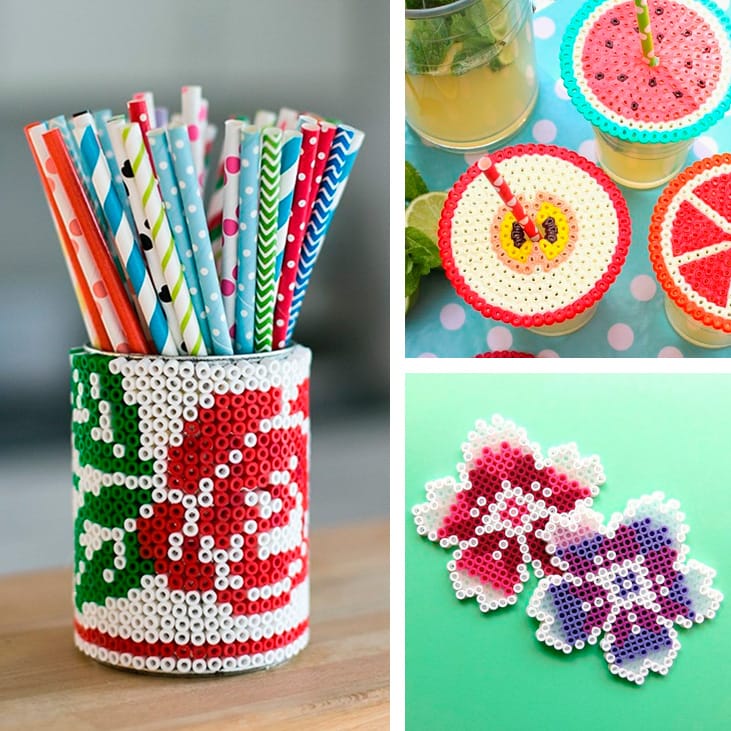
Crafts with iron-on beads

To create decidedly original crafts with iron-on beads , it will be essential to have a few elements available to obtain a satisfactory result:
- Iron-on beads
- Perforated base in circular, square or other more varied shapes
- Greaseproof paper
- Tweezers
- Iron
Method
- Choose the subject to reproduce. If you don’t have precise ideas, you can find many Artkal drawings to make in the photo gallery. Alternatively, you can position the beads to be ironed by reproducing a cross-stitch pattern that does not have too many shades of colour
- Place the pearls on the perforated base, choosing the size of the tablet suitable for the size of the design. Use tweezers to position the small beads more easily; will help you place them correctly on the base
- Place the baking paper over the design and iron it with the iron, passing it over the entire surface of the design so that the heat joins the pearls together. You can choose whether to iron both sides of the beads or just one, the appearance of the final result will depend on this choice. By ironing both sides of the drawing you will obtain a more solid composition
- To obtain an optimal result, I recommend letting your creation cool completely by placing a weight on it, such as a heavy book, to better ensure the fusion of the pearls
- The process is complete, our colorful creation is ready!
Suggestions
- To modify the result obtained and give it a more curved shape, you will have to delicately bend the surface just after passing the iron over the surface and if necessary help yourself with a support, such as a bowl or a plate
- To speed up the search for pearl colors, I recommend organizing them in a plastic container with separators and dividing each color into a specific space
- During the ironing phase, do not use steam, the heat of the iron will take care of welding the beads together
If you are thinking of making crafts with beads to iron together with your children, you are in the right place. In the gallery you will find many original Pyssla patterns to obtain a wide range of decorative but also functional ideas.
Let yourself be inspired!