


Heart Perler Beads (35+ Free Patterns!)
Get over 35 patterns for heart perler beads, perfect for Valentine’s Day or just every day! These patterns are fun and easy for kids or adults.

Who remembers the first time they ever made a heart? By folding paper in half and cutting with a pair of scissors? Because I do.
I’m sure it was when I made my first heart for Valentine’s Day. But all I remember is being “wowed” by the fact that you could create a shape by folding paper in half and cutting it.
Basically, I was amazed by symmetry. Geometry? Whatever. I thought it was cool.
The thing is, hearts are awesome for another reason – not just because they’re symmetrical. And it’s not because they represent love, or are used in Valentine’s Day crafts.
It’s because they are so simple.
So simple, so recognizable, and the perfect “gateway shape” for any sort of creative endeavor. When you’re looking for something basic that is not a circle – the heart comes in really handy.
When you combine a simple shape with a simple craft – perler beading – you get a really cool combination. Heart perler beads!

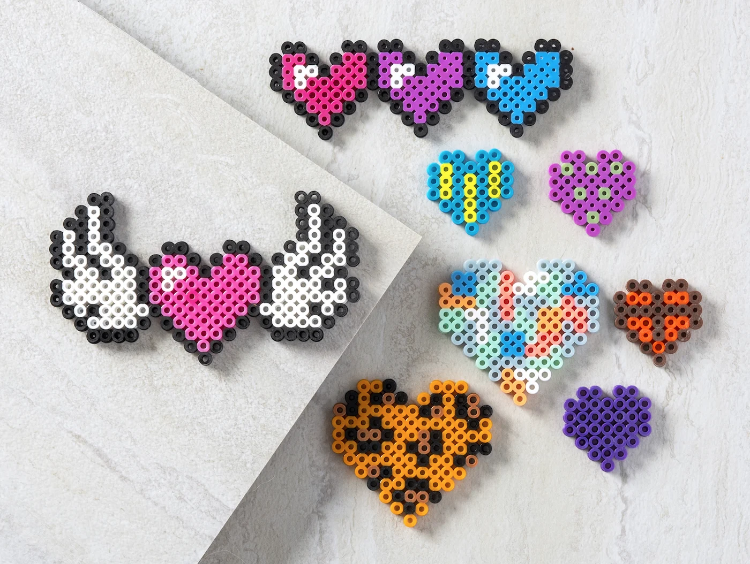
I’ve put together a collection of over 35 heart perler bead patterns of all sizes. If your child (or you) are just getting started with perler beads (or crafts in general) there are some tiny designs.
Then there are progressively larger hearts, with rainbows, florals, and other beautiful prints. There’s a pattern for everyone here!
If you’ve never tried perler beads, they’re so fun and relaxing.
They are recommended for ages six and up, so this is a very fun craft to try with your elementary age kids. If you’re ready to use perler beads (also known as hama beads, fuse beads, or melty beads), you’re going to love this collection of patterns.
Tips for Using Perler Beads
Before we get into the patterns, I want to review a few basics of using hama beads to make sure you get the best results. If you don’t want the tips, scroll down to the bottom to get the heart perler bead patterns.
Remember that the overall goal is to melt the beads together on both sides while still leaving the holes open. Here’s how you get the best results (with a rainbow as an example).
Use Ironing or Parchment Paper
Place ironing paper or parchment paper over the beads on the pegboard. Be gentle so you don’t disturb the beads underneath.

Heat your iron to the medium setting (no steam). In a circular motion, begin to iron the project. Don’t press down too hard with the iron. Use small circles and keep the iron moving the whole time.
When ironed properly, the beads will still have an open center. Check and make sure your edges are melted. Let the design cool on the pegboard.

Note: BE CAREFUL about lifting up the paper while you’re ironing! If you want to check, carefully peel back paper around the edge of your design and see if all the beads are melted.
If you lift the paper up quickly and there are a lot of unmelted beads, they will easily fall off or go flying and you may be forced to start over. Sometimes the edges need more time so when you check, just check the edges and peel paper back slowly.

Another Note: some beads melt faster than others (clear melts faster than white, for example). So some holes might be larger than others. It’s okay! That’s part of the look of the project.
Iron the Other Side
Remove the bead design from the pegboard. Flip it over to the non-melted side and repeat the fusing process.

Remove the Paper
Let cool completely and remove the paper again (which is reusable). Some people pull the paper off after they iron the first side, but I just wait until the end and peel off both pieces. It’s up to you!

Are you ready for the patterns? Get them below!