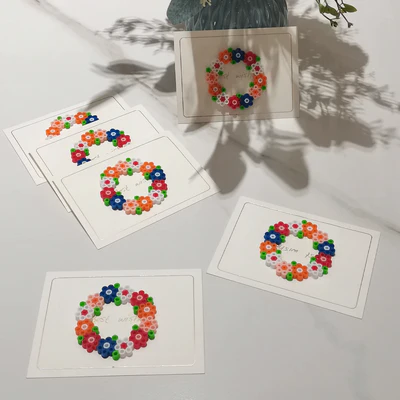
MAKE DIY BIRTHDAY CARDS FROM HAMA BEADS YOURSELF + FREE TEMPLATE–THE PERFECT GIFT IDEA FOR A BIRTHDAY
You want to easily make birthday cards yourself with ironing beads? With this guide it will definitely work! Today I have a small DIY project with fuse beads for you. I made gift cards myself. For this I first made the little cupcakes from fuse beads and then glued them to my self-made cards. Of course you can save the template directly from my blog. You can find more ideas with ironing beads -here- .

I love making gifts myself, so today I made these little cards. I recently rediscovered my passion for fuse beads . As a child I loved to make small iron-on transfers out of Hama beads and I’m right in the middle of this fever again. I hope you like my handicraft instructions.

You need for the rabbits:
– iron beads * white, pink, light blue, red, green and light brown
– pegboard square *
– iron *
– baking paper
For the cards:
– scissors
– glue
– my template
*Links marked with an asterisk are Amazon affiliate links.

Step by step instructions for making cupcakes:
Let’s start with the fuse bead cupcakes first. I think they are so great and you can make them in all colors.
1st step:
Put your fuse beads on your pegboard as shown in the picture. It is best to count the individual beads and place them piece by piece on top.

2nd step:
Now put parchment paper on the fuse beads. Be careful not to let the beads fall over.
3rd step:
Now iron carefully over the baking paper, 20-30 seconds are enough for the ironing beads to connect and fuse together. You can see through the parchment paper a little, so you can check whether the ironing beads are already connected.

4th step:
Now let your cupcake cool on the pegboard so it doesn’t warp.
5th step:
If necessary, you can also iron the other side of the cupcakes. That’s a matter of taste. I also like the iron beads unironed and it is enough that one side is fused.
Step by step handicraft instructions card:
Now it’s time for the homemade card. Of course you can print out the template again from me.
1st step:
First, print out my template. Just click on the picture.

2nd step:
Now cut out the template with scissors.
3rd step:
Fold the template to create a card.

4th step:
Coat your cupcake with glue and attach it to the card.

5th step:
Let everything dry well.
And this is what the homemade birthday cards look like now.

I absolutely love the birthday cards. I think they are a nice gift idea for a birthday.

I made a few more right away so I always have some in stock and you always have a birthday card at home.

What do you think of this craft idea? I like this little DIY. If you are still looking for more gifts, have a look -here- over.

Best wishes and have fun making it yourself!


You are reading: Make DIY birthday cards from Hama beads yourself + free template – the perfect gift idea for a birthday


